
Soft & Cakey Egg-Free Brownies (No Dairy, No Nuts!)
An allergy-friendly, chocolatey treat you can whip up anytime! This is a one-bowl, egg-free and dairy-free brownie recipe (no specialty subs, no weird ingredients) that bakes in under an hour and comes out soft, rich, and cakey with chewy edges — perfect for kids with allergies or anyone craving chocolate fast.
If you’ve ever tried to bake brownies without eggs, you know how tricky it can be. After years of testing, tweaking, and totally failing (more than once!), I finally nailed it – the perfect egg-free, dairy-free brownie.
These one-bowl egg-free brownies are all about simplicity and come together in minutes — no egg replacers, no dairy substitutes, no flax or chia or mystery binders — just pantry basics working in harmony.
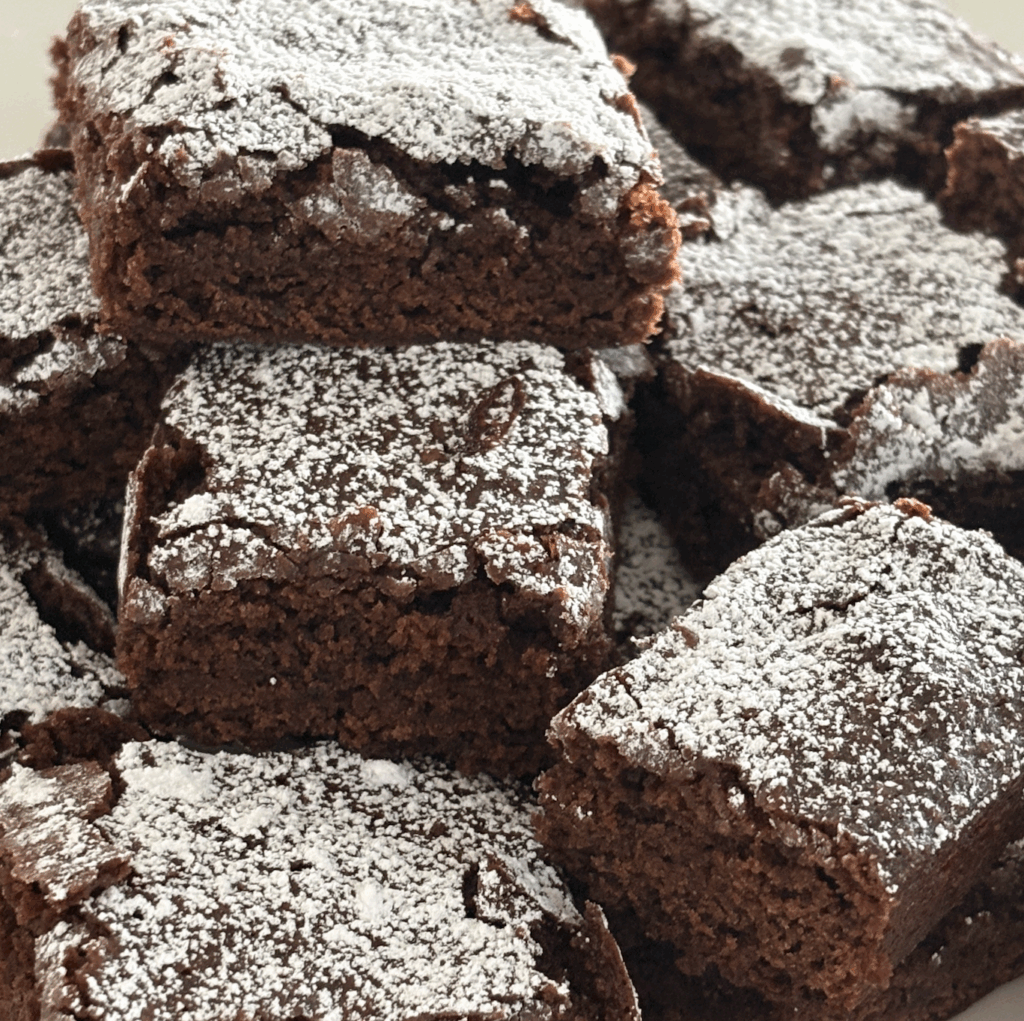
They’re soft, rich, and perfectly cakey, with just the right amount of chew around the edges — that classic brownie texture you crave, minus the allergens. Whether you’re baking for someone with an egg allergy, dairy sensitivity, or nut allergy, or you just ran out of eggs, this recipe delivers every time.
This is one of those recipes you turn to when you just need something quick, reliable, and sweet.
Dara
In This Post: Everything You Need for Egg-Free, Dairy-Free, Brownies
In This Post: Everything You Need for Egg-Free Brownies
Why You’ll Love These Cakey Egg-Free Brownies
- No eggs, no dairy, no nuts, no problem. Perfect for families with food allergies or anyone looking for a delicious dairy-free chocolate dessert.
- Simple pantry ingredients. You probably have everything you need already.
- Cakey (not fudgy!) — If you prefer soft cake texture instead of dense fudge, this one’s for you. It’s moist, cake-like, and chewy around the edges — the best of both brownie worlds.
- Quick cleanup. Just one bowl and a whisk or spoon.
These easy eggless brownies for kids with allergies deliver the same rich, chocolatey goodness as traditional recipes.
My Brownie Journey (aka “Failed It Until I Nailed It”)
Like most allergy-friendly recipes, this one didn’t come easy. When my son was little and couldn’t eat eggs or nuts, I went on a mission to find a brownie that actually felt like a brownie — not a dry cake pretending to be one or a gooey mess that didn’t hold shape. It took me years of experimenting (and a few comically bad batches) before landing on this version.
Every time I make them now, I still feel a tiny victory — proof that good things really do come to those who bake (and bake again).
Ingredients for Egg-Free, Dairy-Free Brownies
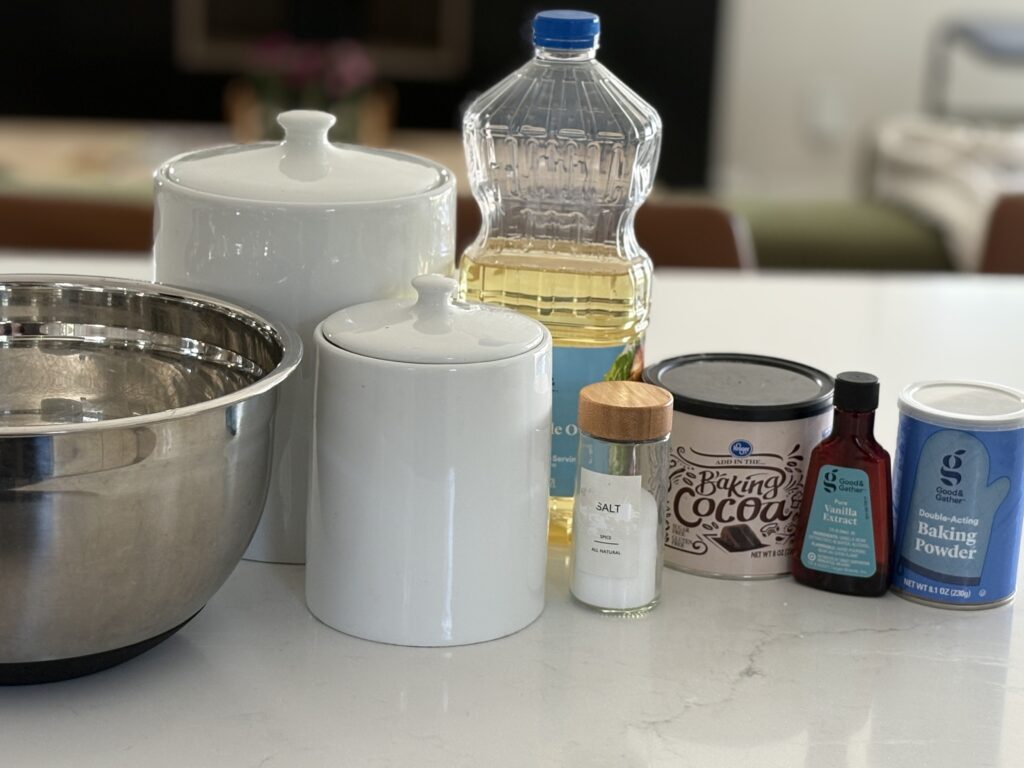
A handful of pantry staples is all you need for these allergy-friendly brownies — no fancy egg replacers or dairy substitutes, just simple ingredients that come together like magic.
You probably have most of these already in your kitchen. Once you’ve rounded them up, you’re halfway to a soft, rich, and perfectly chewy batch of brownies.
The basics:
- ½ cup water
- ½ cup vegetable oil
- ½ teaspoon vanilla extract
- 1 cup granulated sugar
The dry mix:
- 1 cup all-purpose flour
- 6 tablespoons unsweetened cocoa powder (measure carefully — it’s easy to lose count!)
- ½ teaspoon baking powder
- ½ teaspoon salt
For finishing:
Powdered sugar, for dusting (optional but recommended — a tea infuser makes it perfect)
Ingredient Notes:
- Oil: Any neutral oil works here.
- Cocoa powder: Make sure to use pure, unsweetened cocoa — some pre-packaged cocoa mixes contain milk or have cross-contamination warnings. Check the label to confirm it’s dairy-free.
- Parchment paper: Lining the pan makes cleanup easier and gives you cleaner brownie edges.
Note: This is truly a pantry-ingredient recipe—no specialty replacements required beyond usual baking staples. I use Kroger’s store-brand ingredients for everything in this recipe — they bake up perfectly every time.
Let’s Make These Delicious Allergy-Free Desserts
These are some of the easiest brownies you’ll make — one bowl, no mixer, and no substituting experiments.
Mix the wet ingredients.
Grab a large bowl and whisk together the water, vegetable oil, vanilla, and sugar. Stir until the sugar dissolves — it should look glossy and a little syrupy.
Add the dry ingredients.
Now, add the flour, cocoa powder, baking powder, and salt — in that order — mixing just a bit after each one. Take your time with the cocoa powder, stirring gently as you go. If you dump it all in at once, it tends to puff up into your face (I learned that one the messy way).
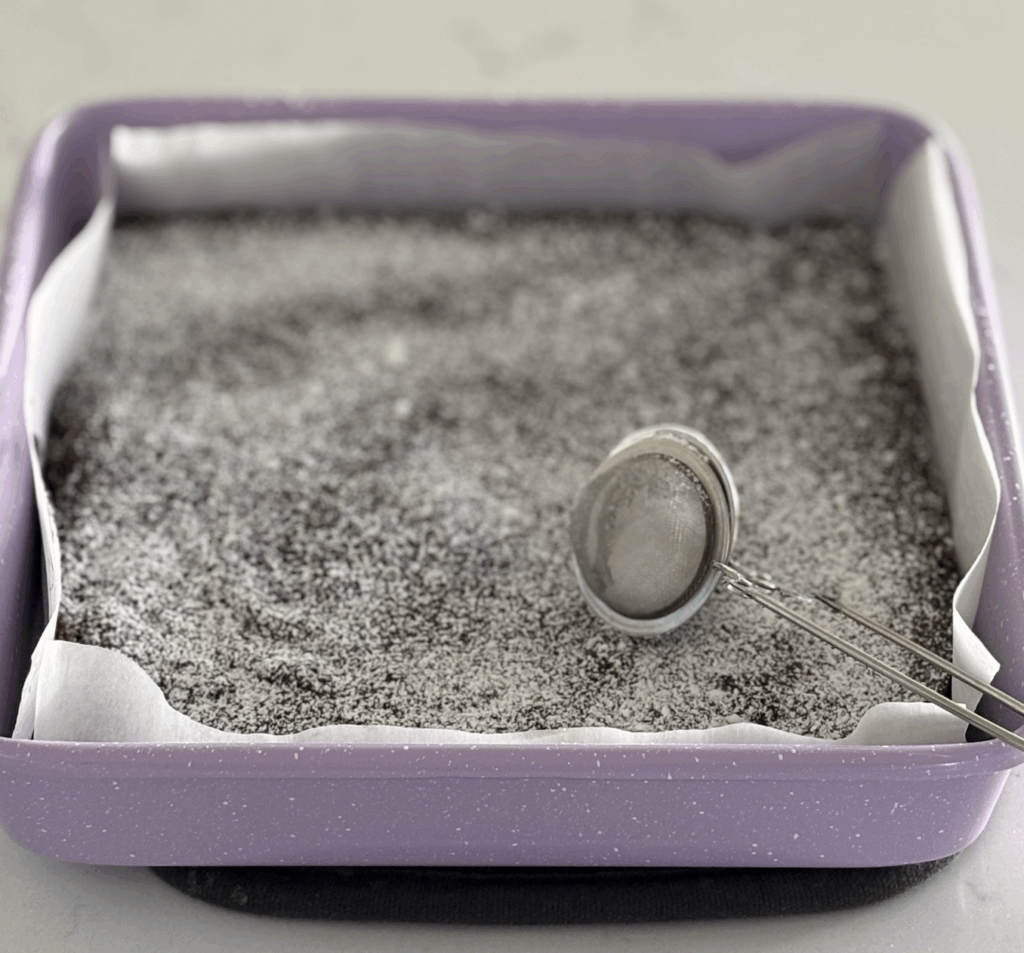
Line your pan.
Cut a piece of parchment paper slightly larger than your 9×9-inch pan. Snip a small square off each corner so it folds neatly into the pan — it’s a simple trick that helps the parchment sit perfectly flat. It also makes cleanup easier, keeps the edges from burning, and lets you lift the brownies out cleanly once they’ve cooled.
Pour and bake.
Pour your batter into the lined pan, smooth out the top, and slide it onto the middle rack of your preheated 350°F oven. Bake for about 40 minutes, or until a toothpick inserted in the center comes out clean.
Cool completely.
This part’s important — let the brownies cool fully in the pan before slicing. They finish setting as they cool, and that’s what gives them their soft, rich texture with just the right chew at the edges.
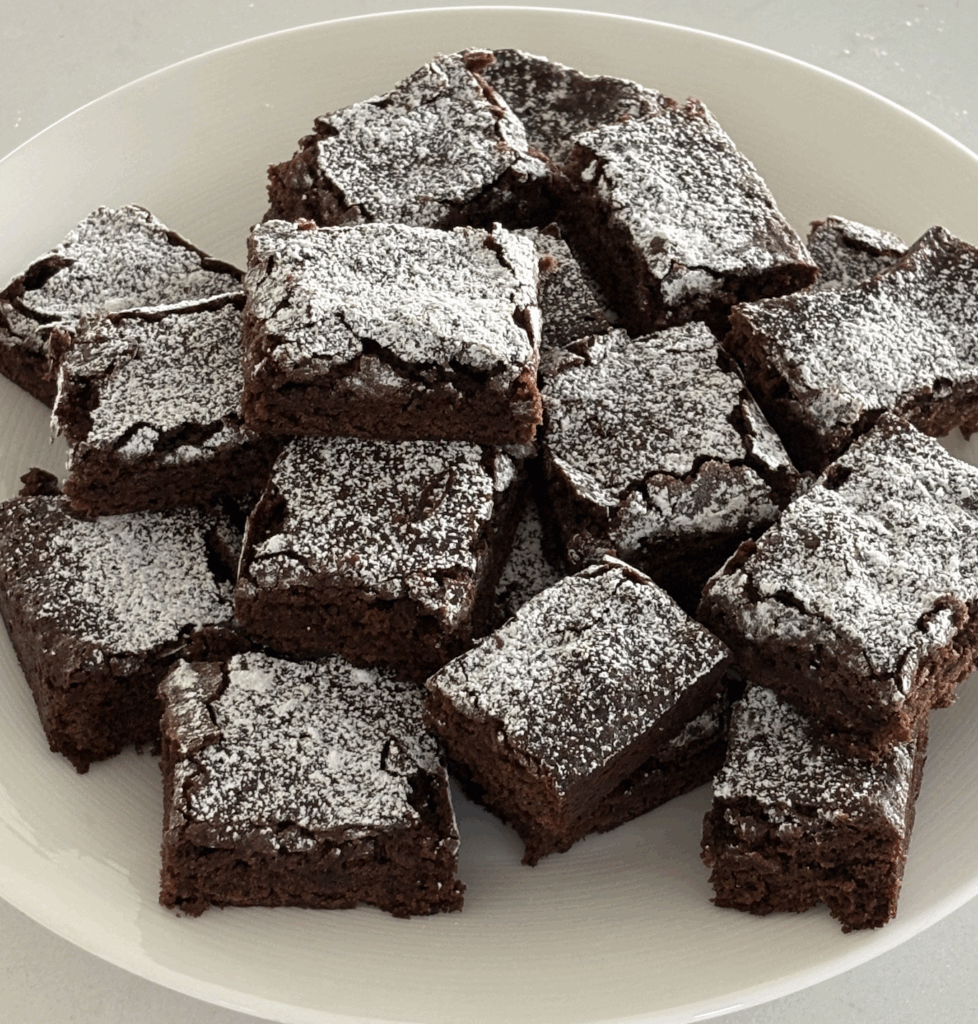
Finish and serve.
Once cool, dust the top with a little powdered sugar (a tea infuser works perfectly for this!). Slice into squares and enjoy with a glass of milk (or oat milk, if you’re keeping things dairy-free).
Tips & Tricks for the Perfect Egg-Free, Dairy-Free Brownies
These brownies are quick and simple to make, but a few small tricks will make them turn out just right every time. Here’s what I’ve learned after years of testing (and a few hilarious fails along the way):
Go slow with the cocoa powder.
Add the cocoa gradually and stir gently as you go — otherwise, it tends to puff up into your face and all over your counter. Slow and steady keeps your kitchen (and shirt) chocolate-free.
Line your pan the right way.
Cut your parchment paper slightly larger than your 9×9 pan, then snip a small square off each corner so it folds neatly inside. This makes cleanup easier, keeps the edges from burning, and helps you lift out the brownies in one clean piece once they’ve cooled.
Don’t overmix.
You don’t need to whisk like crazy. Once the ingredients are combined, stop stirring. Overmixing can make the texture tough instead of tender.
Count those cocoa scoops.
It’s surprisingly easy to lose track mid-bake — I’ve done it countless times. Count out all six tablespoons clearly before moving on.
Cool completely before cutting.
These brownies set as they cool, which gives them their soft, chewy edges and tender middle. Cutting too early can make them crumble or stick to your knife.
Use Tea Infuser to Dust Powdered Sugar
Once cooled, dust the top with powdered sugar for a bakery-style finish. A stainless-steel tea infuser makes the perfect mini sifter.
Storage and freezing tips.
Keep leftovers in an airtight container at room temperature for up to 3 days. For longer storage, freeze for up to 2 months. When you’re ready for more, thaw them in the fridge until soft again — they’ll taste freshly baked.
A truly quick dessert.
This is one of those go-to recipes for when you need something fast. No shaping, no scooping — just stir, pour, and bake. Perfect for a last-minute gathering or weeknight sweet tooth.
Serving & Storage Tips
- These brownies are amazing slightly warm with a scoop of dairy-free whipped cream.
- Store leftovers in an airtight container at room temperature for up to 3 days.
- For longer storage, wrap tightly and freeze up to 2 months — just thaw at room temp before serving.
Egg-Free, Dairy-Free Brownies: Frequently Asked Questions
Once the sugar has dissolved into the wet ingredients, add your dry ingredients one at a time and mix just until everything is combined. The goal is to blend — not beat. Overmixing can make the brownies tougher and less tender. When in doubt, stop stirring as soon as you don’t see any dry flour left.
Keep them in an airtight container at room temperature for up to 3 days. They’ll stay soft and moist. If you’d like to keep them longer, wrap them tightly and freeze for up to 2 months. To thaw, simply move them to the fridge until soft again — no microwave needed.
This recipe was developed specifically to be egg-free and dairy-free without needing extra replacements. We haven’t tested additional substitutions (like applesauce, gluten-free flour, or different oils), so results may vary. If you try a variation, we’d love to hear how it turns out!
Yes! You can double it and bake in a 9×13-inch pan. Keep an eye on the baking time — Start checking doneness around 45–50 minutes instead of 40. It may need a few extra minutes. The brownies are done when a toothpick in the center comes out clean. If the edges are done but the center still looks slightly underbaked, tent it loosely with foil to prevent overbrowning.
Yes — these brownies are intentionally cakey, not fudgy. They have a soft, light crumb with a chewy edge — the kind of brownie that feels like a cross between a slice of cake and a classic brownie.
Nothing fancy here — just the basics! You’ll need a large mixing bowl, a sturdy spoon or whisk, and a 9×9-inch baking pan. A rubber spatula helps smooth the batter evenly into the pan before baking. For the powdered-sugar finish, a stainless-steel tea infuser makes a surprisingly perfect mini sifter — it gives you that pretty, even dusting without the mess.
Absolutely. These are egg-free, dairy-free, and nut-free — plus they have no specialty substitutes, making them a reliable choice for many allergy-safe events.
It means you stir everything into one mixing bowl — no need for multiple bowls, special equipment, or layering steps.
Final Thoughts
If you’ve been searching for a foolproof egg-free, dairy-free brownie recipe that still delivers on flavor and texture, this is it. It’s the brownie that made me believe again — and I think it’ll do the same for you.
Source Note: This recipe comes straight from Dara’s kitchen, where she spent years searching for an egg-free, dairy-free brownie her whole family could enjoy. For more on baking science and allergy-safe substitutions, check out King Arthur Baking’s Guide to Baking Science and FARE’s Allergy-Friendly Baking Tips.
Egg-Free & Dairy-Free Brownies | One-Bowl, Cakey with Chewy Edges
Ingredients
Equipment
Method
- Preheat oven to 350°F (175°C).
- Line a 9×9-inch pan with parchment paper.
- In a large mixing bowl, combine water, vegetable oil, vanilla, and sugar. Stir with large metal spoon until sugar dissolves. (One minute)
- Add dry ingredients in this order: flour, cocoa powder, baking powder, and salt. Mix gently with a large metal spoon between each addition until combined.
- Pour the brownie batter into the prepared pan and smooth the top with a spatula.
- Bake on the middle rack for about 40 minutes, or until a toothpick inserted in the center comes out clean.
- Cool completely in the pan.
- Remove as one unit by pulling the edges of the parchment paper.
- Dust with powdered sugar before serving.
- Cut using a large sharp knife for cleaner edges.